Why IT teams should automate repetitive operations

Why IT teams should automate repetitive operations

Modern infrastructure teams spend an enormous amount of time on repetitive operational tasks:

  • Creating user accounts

  • Running routine health checks

  • Sending alerts and reports

  • Triggering scripts across systems

  • Synchronizing data between services

Many of these tasks are simple but frequent, which makes them perfect candidates for automation.

While scripting (Bash, Python, PowerShell) solves part of the problem, orchestration between tools often becomes complex. This is where n8n becomes extremely useful for IT operations teams.

n8n allows you to visually orchestrate automation workflows while still integrating with scripts and APIs.

What is n8n and why it fits IT operations

n8n is an open‑source workflow automation platform designed for connecting systems and automating processes.

Unlike many automation platforms:

  • It can be self-hosted

  • It supports custom code nodes

  • It integrates easily with APIs, scripts, and webhooks

  • It fits well in DevOps and infrastructure environments

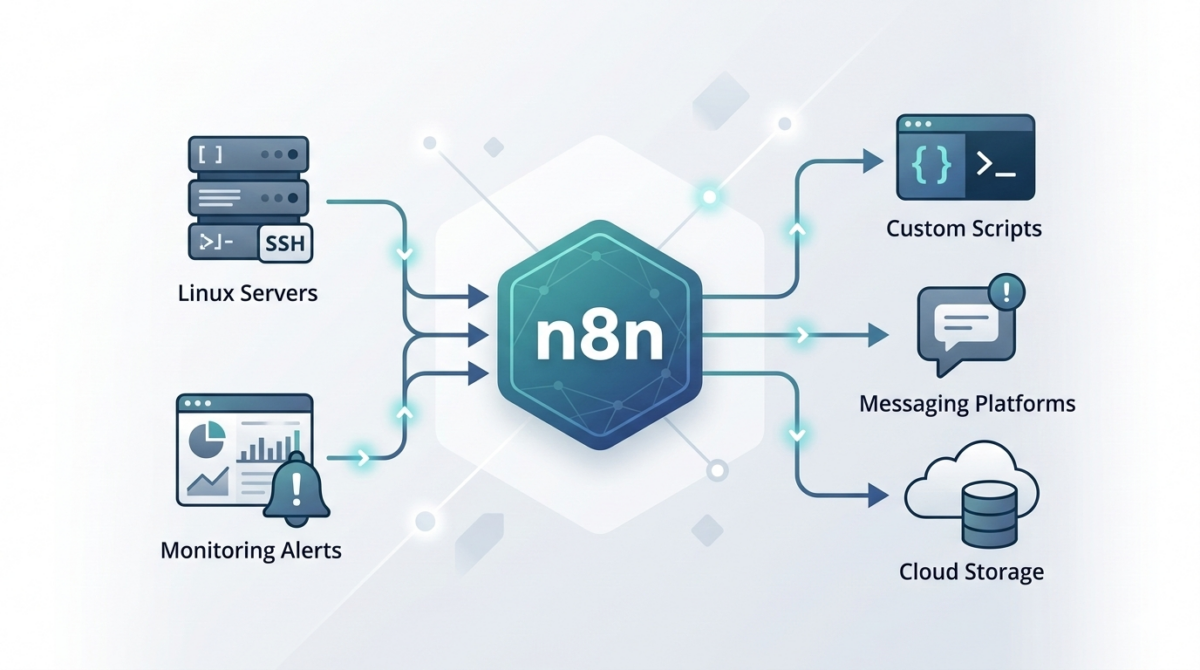
For infrastructure teams, this means you can connect:

  • monitoring systems

  • infrastructure scripts

  • messaging platforms

  • ticketing systems

  • CI/CD tools

…all inside a single automation pipeline.

Common infrastructure workflows you can automate with n8n

1. Automated incident notifications

Instead of manually posting alerts to Slack or email, n8n can automatically process monitoring alerts.

Example flow:

  1. Monitoring tool sends webhook

  2. n8n parses the alert

  3. Severity is evaluated

  4. Slack/Teams message is sent

  5. Incident ticket is automatically created

This removes manual triage steps and ensures consistent communication.

2. Scheduled infrastructure health reports

Operations teams often check server health manually.

With n8n you can schedule a workflow that:

  • runs a script via SSH

  • collects system metrics

  • aggregates results

  • sends a daily infrastructure report

Example workflow:

Trigger → SSH Node → Parse Script Output → Send Email / Slack

3. Automatic user onboarding

When a new employee joins, multiple systems must be configured:

  • Linux access

  • Git repository permissions

  • VPN access

  • monitoring dashboards

n8n can orchestrate these tasks:

HR system webhook → n8n workflow → API calls + scripts → notification to IT

The entire onboarding process becomes consistent and traceable.

4. Script orchestration across servers

Many IT teams rely on scripts but lack a centralized orchestrator.

n8n can act as a lightweight control layer:

Trigger → Run script → Parse result → Decide next step → Notify

For example:

Trigger: webhook
Action: run Ansible / Bash script
Result: evaluate output
Next: send Slack success/failure message

5. Automated backups and validation

Backups are critical but verification is often skipped.

n8n can automate backup workflows:

  • Trigger scheduled job

  • Call backup script

  • Validate file integrity

  • Store metadata

  • Send report to ops channel

Example: Simple server check workflow

A basic workflow might look like this:

  1. Cron trigger – runs every hour

  2. SSH node – executes a script on the server

  3. IF node – checks response values

  4. Slack node – sends alert if something is wrong

This type of automation reduces manual monitoring significantly.

Best practices for using n8n in infrastructure environments

Run n8n self-hosted

Self-hosting gives you:

  • data control

  • internal network access

  • better security posture

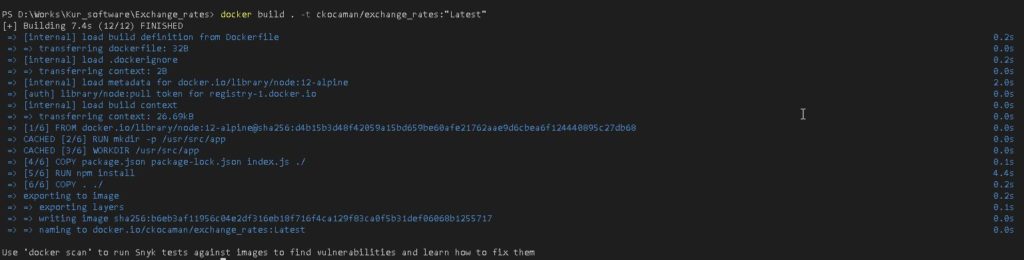
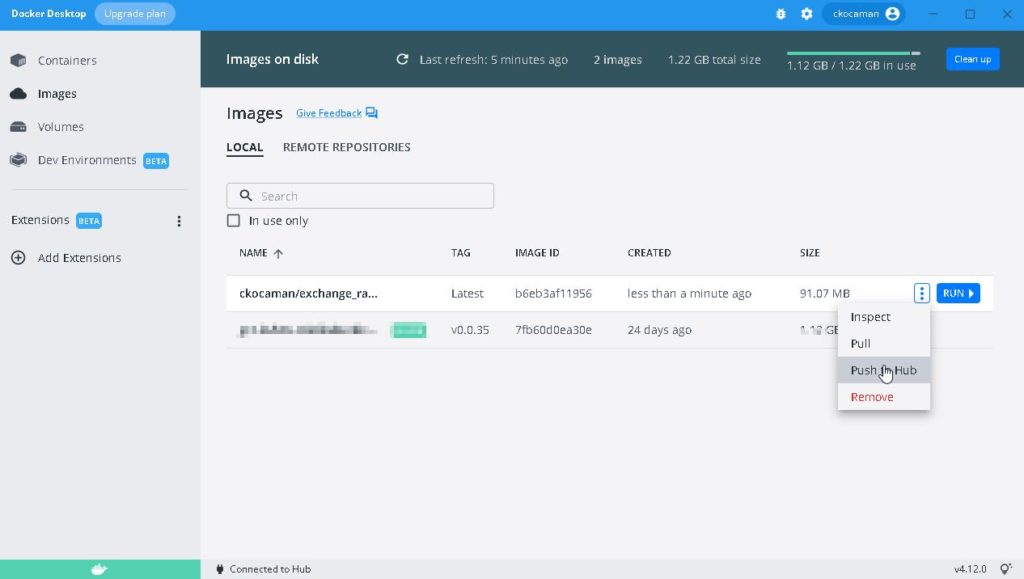
Most teams run n8n using:

  • Docker

  • Kubernetes

  • VM-based deployment

Use credentials and secrets securely

Avoid storing secrets in plain text inside workflows.

Best practices:

  • environment variables

  • secret managers

  • restricted credential access

Log and monitor workflows

Automation failures should be visible.

Recommended:

  • send workflow failure alerts

  • enable execution logging

  • track automation metrics

Version-control workflows

Store exported workflows in Git so changes are tracked.

This allows:

  • rollback

  • collaboration

  • documentation

Where n8n fits in a DevOps stack

n8n is not a replacement for configuration management tools like:

  • Ansible

  • Terraform

  • Kubernetes operators

Instead, it acts as an automation glue layer between systems.

Typical stack example:

Terraform → infrastructure provisioning
Ansible → configuration management
n8n → operational automation and orchestration

Conclusion

Automation is no longer optional for modern IT teams.

Tools like n8n allow infrastructure engineers to:

  • automate repetitive operations

  • integrate multiple systems

  • reduce manual errors

  • improve operational visibility

By combining scripting skills with workflow orchestration, teams can dramatically increase operational efficiency.

Centralized Logging for Windows and Linux: A Practical Blueprint for IT Ops

Centralized Logging for Windows and Linux: A Practical Blueprint for IT Ops

When something breaks at 02:13 AM, logs are either your best friend—or completely useless.

In mixed environments (Windows + Linux + on-prem + cloud), logs are often:

  • scattered across servers,

  • overwritten too quickly,

  • inaccessible during incidents,

  • or never reviewed until after an outage.

A centralized logging strategy transforms logs from passive files into an operational control system.

This guide outlines how to design a scalable, secure, and useful logging architecture for real-world IT environments.


Why Centralized Logging Is Not Optional Anymore

Incident response speed

Without centralized logs:

  • You SSH/RDP into multiple machines.

  • You manually grep or search Event Viewer.

  • You lose precious time correlating events.

With centralized logging:

  • You search once.

  • You correlate across systems instantly.

  • You reduce Mean Time To Resolution (MTTR).

Security visibility

Modern attacks move laterally.
If logs stay local, detection becomes nearly impossible.

Central logs enable:

  • suspicious login pattern detection

  • privilege escalation tracing

  • anomaly identification across hosts

Compliance and audit

Many standards require:

  • log retention policies

  • tamper-resistant storage

  • traceability of admin actions


Step 1: Define What to Log (Not Everything Is Equal)

Logging everything blindly leads to noise.

Windows (Recommended Sources)

  • Security Event Logs (logon events, privilege use)

  • System logs

  • Application logs

  • PowerShell logs (script block logging)

  • Sysmon (for deeper visibility)

Linux (Recommended Sources)

  • auth.log / secure

  • syslog / journald

  • sudo logs

  • SSH logs

  • application-specific logs (nginx, apache, docker, etc.)

Key Principle

Log based on:

  • security relevance

  • operational value

  • troubleshooting frequency

  • compliance needs


Step 2: Choose an Architecture Model

Option A: Agent-Based Collection

Each server runs a lightweight agent:

  • forwards logs securely

  • buffers during outages

  • supports filtering and parsing

Pros:

  • reliable delivery

  • fine-grained control

Cons:

  • agent lifecycle management required

Option B: Agentless / Pull-Based

Central system pulls logs via:

  • Windows Event Forwarding (WEF)

  • Syslog forwarding

  • API-based integrations

Pros:

  • fewer components per host

Cons:

  • less flexible filtering

  • scaling challenges in large environments

In most real infrastructures, agent-based models scale better.


Step 3: Standardize Log Structure

If Windows logs and Linux logs look completely different, correlation becomes painful.

Normalize Fields

Ensure consistent fields such as:

  • hostname

  • environment (dev/stage/prod)

  • IP address

  • user

  • severity

  • timestamp (UTC strongly recommended)

Add Context

Tag logs with:

  • service name

  • business criticality

  • region

  • patch group or cluster

Context is what turns logs into intelligence.


Step 4: Secure the Logging Pipeline

Logs contain sensitive data:

  • usernames

  • internal IPs

  • command history

  • sometimes secrets (misconfigured apps)

Security Requirements

  • TLS encryption in transit

  • role-based access control

  • separation of admin vs read-only roles

  • immutable or append-only storage

  • log retention policies

Protect Against Log Tampering

Attackers often:

  • delete logs

  • modify local log files

  • disable logging services

Centralized and restricted storage prevents this.


Step 5: Retention and Storage Strategy

Define retention by tier.

Example:

  • Security logs: 180–365 days

  • Operational logs: 30–90 days

  • Debug logs: short-term (7–14 days)

Consider:

  • storage cost vs compliance

  • hot vs cold storage

  • searchable vs archived logs


Step 6: Build Operational Use Cases

Logging is useless without queries and alerts.

Operational Use Cases

  • Service crash detection

  • Repeated restart loops

  • Disk error patterns

  • Failed scheduled tasks

Security Use Cases

  • Multiple failed login attempts

  • Admin group membership changes

  • New service installation

  • Suspicious PowerShell execution

Create dashboards per:

  • infrastructure tier

  • business service

  • security monitoring


Step 7: Avoid Common Logging Mistakes

Logging without monitoring

Collecting logs without alerts or dashboards = expensive storage.

Over-collecting

Too much noise hides real signals.

No ownership

Define:

  • who reviews alerts

  • who maintains parsers

  • who manages retention policies

Logging must be part of operations—not an afterthought.


Conclusion

Centralized logging is not a “SIEM project.”
It is core infrastructure hygiene.

Done correctly, it provides:

  • faster incident response

  • stronger security posture

  • audit readiness

  • operational clarity

Logs are not just records.
They are your infrastructure memory.

Patch Management at Scale: How to Update Windows and Linux Without Breaking Production

Patch Management at Scale: How to Update Windows and Linux Without Breaking Production

Patching is one of the highest ROI security controls—yet it’s also one of the fastest ways to break production if done poorly.

In mixed environments (Windows + Linux + cloud + on‑prem), patching often becomes:

  • a monthly fire drill,

  • a spreadsheet-driven process,

  • or “we’ll do it later” until an incident forces your hand.

This article outlines a practical patch management approach you can roll out in real infrastructure: predictable, auditable, and designed to minimize downtime.


Why Patch Management Fails in Real Ops

Inconsistent inventories

If you can’t answer “what systems exist?”, patching becomes guesswork. Shadow VMs, old endpoints, and forgotten servers create blind spots.

Unclear ownership

“Who owns this server?” is a common patch blocker. Without service ownership, patching stalls.

One-size-fits-all windows

Patching “everything on Sunday night” ignores business criticality and dependencies.

No verification loop

Many teams patch, reboot, and move on—without validating service health, kernel versions, or application behavior.


Patch Management Goals (What “Good” Looks Like)

A mature patch program should deliver:

Predictability

  • Fixed cadence for routine updates

  • Defined emergency process for critical CVEs

Risk-based prioritization

  • Critical internet-facing systems patched first

  • Lower-risk systems batched later

Minimal disruption

  • Rolling updates

  • Maintenance windows aligned to service needs

  • Automated prechecks/postchecks

Evidence and auditability

  • Patch status reporting

  • Change tracking

  • Exception handling with expiry dates


Step 1: Build a Reliable Asset Inventory

What to capture

  • Hostname, IP, OS/version, kernel/build

  • Environment (dev/stage/prod)

  • Criticality tier (1–4)

  • Owner/team and service name

  • Patch group (e.g., “prod-web-rolling”)

Practical sources

  • AD + SCCM/Intune (Windows)

  • CMDB (if accurate)

  • Cloud APIs (AWS/GCP/Azure inventory)

  • Linux tools (e.g., osquery, landscape, spacewalk equivalents)

  • Monitoring/EDR platforms (often best truth source)


Step 2: Define Patch Rings and Maintenance Policies

Patch rings reduce blast radius.

Example ring model

Ring 0 — Lab/Canary

  • First patch landing zone

  • Includes representative app stacks

Ring 1 — Low-risk production

  • Internal services, non-customer-facing nodes

Ring 2 — Core production

  • Customer-facing workloads with rolling capability

Ring 3 — Critical/Stateful

  • Databases, domain controllers, cluster control planes

  • Heavier change control, deeper validation

Service-based maintenance windows

Instead of one global window:

  • align patching to service usage patterns,

  • and use rolling updates where possible.


Step 3: Standardize on Tooling Per Platform

Windows (common patterns)

  • Intune / WSUS / SCCM / Windows Update for Business

  • GPO for policy enforcement

  • Maintenance windows tied to device groups

Key practices:

  • staged deployments (rings)

  • automatic reboots only in controlled windows

  • reporting for “installed vs pending reboot”

Linux (common patterns)

  • configuration management (Ansible/Salt/Puppet/Chef)

  • distro-native repos + internal mirrors

  • unattended-upgrades (carefully) for low-risk groups

Key practices:

  • pin critical packages if required

  • kernel update strategy (reboot coordination)

  • consistent repo configuration


Step 4: Automate Prechecks and Postchecks

This is where patching becomes safe.

Prechecks (before patching)

  • disk space and inode availability

  • pending package locks / broken deps

  • snapshot/backup status (where applicable)

  • service health baseline (CPU/mem, error rates)

  • cluster state (no degraded nodes)

Postchecks (after patching)

  • OS build / kernel version updated

  • reboot completed and uptime as expected

  • service is healthy (HTTP checks, synthetic tests)

  • logs show no startup failures

  • monitoring confirms normal KPIs


Step 5: Reboot Strategy Without Downtime

Stateless tiers: rolling restarts

  • drain one node at a time

  • patch + reboot

  • verify health

  • re-add to pool

  • proceed to next node

Stateful tiers: controlled approaches

  • leverage replication/failover where possible

  • patch secondaries first

  • promote/demote intentionally

  • schedule longer windows and validate data integrity


Step 6: Handling Critical CVEs (Out-of-Band)

When a critical CVE drops:

  1. Identify affected assets quickly (inventory is everything)

  2. Prioritize internet-facing and high-privilege systems

  3. Patch canary first (short validation)

  4. Roll through rings with accelerated windows

  5. Document exceptions with deadlines


Step 7: Reporting, Exceptions, and Compliance

Metrics worth tracking

  • Patch compliance % by ring and environment

  • Mean time to patch (MTTP) for critical CVEs

  • Reboot compliance

  • of exceptions and time-to-expiry

Exception policy (must-have)

If a system can’t be patched:

  • require risk acceptance approval

  • define compensating controls (WAF, isolation, hardening)

  • set an expiry date (no “forever exceptions”)


Conclusion

Patch management isn’t “install updates.”
It’s a repeatable operational system:

  • inventory → rings → controlled rollout

  • automation → verification → reporting

  • exceptions with deadlines, not excuses

If you run Windows and Linux at scale, patching can be both fast and safe—but only when it’s treated like an engineered process.

Secrets Management in DevOps — From .env Files to Enterprise-Grade Control

Secrets Management in DevOps: From .env Files to Enterprise-Grade Control

API keys. Database passwords. SSH private keys. OAuth tokens.
Secrets are everywhere in modern infrastructure—and they are one of the most common breach vectors.

In many environments, secrets still live in:

  • .env files

  • CI/CD variables

  • shared password managers

  • copied Slack messages

  • or worse… Git repositories

As infrastructure scales, this approach becomes dangerous.

This guide explains how to evolve from ad-hoc secret handling to structured, auditable, and secure secrets management—without breaking pipelines or slowing teams down.


Why Secrets Become a Hidden Risk

1) Secrets Spread Faster Than Code

Developers copy:

  • .env files between machines

  • API tokens into scripts

  • credentials into automation workflows

Soon, you lose track of:

  • where secrets are stored

  • who has access

  • which ones are still valid


2) Long-Lived Credentials = Long-Term Risk

Static secrets:

  • rarely rotated

  • shared across environments

  • reused in multiple systems

If leaked once, they remain valid until manually revoked.


3) Automation Amplifies Exposure

CI/CD pipelines, infrastructure-as-code, and workflow tools (like n8n) increase the number of systems that require credentials.

More automation = more secret sprawl if unmanaged.


The Principles of Modern Secrets Management

A mature approach is based on five principles:

1) Centralization

Secrets must live in a centralized secret store, not:

  • Git

  • local files

  • environment variables scattered across hosts

Centralization provides:

  • single control point

  • audit logs

  • policy enforcement


2) Least Privilege Access

Each system or service should only access:

  • the specific secret it needs

  • for the minimum duration required

Not:

  • “full access to all secrets in prod”


3) Short-Lived Credentials

Instead of static credentials:

  • use dynamic, time-limited secrets

  • generate database credentials on demand

  • issue temporary cloud tokens

If compromised, the blast radius is limited.


4) Automatic Rotation

Rotation should be:

  • scheduled

  • automated

  • transparent to applications

Manual rotation does not scale.


5) Full Auditability

You should be able to answer:

  • Who accessed which secret?

  • From which system?

  • At what time?

  • For what purpose?

If you can’t answer this, you have governance gaps.


Practical Architecture for DevOps Teams

You don’t need a massive transformation to improve security.

Phase 1: Remove Secrets from Git

  • Scan repositories for leaked credentials

  • Revoke exposed secrets immediately

  • Replace with environment injection from a secure store

This is the fastest risk reduction step.


Phase 2: Introduce a Central Secret Store

Adopt:

  • Vault-style systems

  • Cloud-native secret managers

  • Encrypted secret backends integrated with CI/CD

All pipelines should fetch secrets at runtime—not store them permanently.


Phase 3: Implement Dynamic Secrets for High-Risk Systems

Especially for:

  • databases

  • cloud IAM roles

  • production SSH access

  • automation service accounts

Dynamic credentials dramatically reduce breach impact.


Phase 4: Secure Automation Platforms (Including n8n)

Automation tools often become secret hubs.

Best practices:

  • store credentials in encrypted backend

  • restrict workflow-level access

  • separate dev/stage/prod secrets

  • audit workflow changes

  • restrict export permissions

Automation must not become a secret leakage vector.


Common Anti-Patterns

“Base64 encoding is enough.”

It is not encryption.


“Only Dev has access, so it’s safe.”

Internal threats and compromised laptops are real risks.


“We rotate once per year.”

In modern threat models, that is effectively static.


Incident Reality: Secrets Leak

When—not if—a secret leaks:

  1. You must detect it quickly.

  2. You must rotate immediately.

  3. You must understand blast radius.

  4. You must audit historical usage.

Without centralized management, this becomes chaos.

With structured secrets management, it becomes a controlled response.


Conclusion

DevOps accelerates delivery—but unmanaged secrets accelerate breaches.

Mature secrets management enables:

  • safer automation

  • reduced blast radius

  • audit-ready infrastructure

  • stronger Zero Trust posture

You don’t need perfection to start.
You need centralization, rotation, and visibility.

From .env files to enterprise-grade control—this is one of the highest ROI security upgrades any infrastructure team can implement.

GitOps for Infrastructure Teams: From Manual Changes to Declarative Control

GitOps for Infrastructure Teams: From Manual Changes to Declarative Control

Infrastructure teams are under constant pressure: faster deployments, tighter security, more environments, more automation. Yet in many organizations, infrastructure changes still happen through SSH sessions, manual edits, and undocumented tweaks.

This is where GitOps changes the game.

GitOps is not just for Kubernetes-native startups. It is a powerful operating model for infrastructure, security baselines, configuration management, and even automation workflows.

This article explains how infrastructure teams can adopt GitOps pragmatically—without disrupting operations.


What Is GitOps (Beyond the Buzzword)?

At its core, GitOps means:

  • Git is the single source of truth

  • Desired system state is declared in code

  • Changes happen via pull requests

  • Automation reconciles actual state to desired state

  • Drift is detected and corrected automatically

It replaces:

  • “I logged into the server and changed it”
    with:

  • “I submitted a PR that changed the declared state”


Why Infrastructure Teams Struggle Without GitOps

1) Configuration Drift

Two servers built from the same template end up different over time.

Manual fixes, hot patches, and undocumented changes create invisible risk.

2) No Change Traceability

When an incident happens:

  • Who changed the firewall rule?

  • When was that service modified?

  • Why was that port opened?

Without Git history, answers are guesswork.

3) Security Blind Spots

Manual changes often bypass:

  • peer review

  • policy checks

  • security scanning

This creates compliance and audit risks.


Core Components of GitOps for Infra

You don’t need to start with Kubernetes to do GitOps.

1) Infrastructure as Code (IaC)

Use declarative tools like:

  • Terraform

  • Ansible (declarative mode)

  • Pulumi

  • CloudFormation

Infrastructure becomes version-controlled code.


2) Pull Request Workflow

Every change:

  • goes through PR

  • is reviewed

  • is validated automatically

  • is merged only if compliant

This adds:

  • accountability

  • collaboration

  • rollback capability


3) Automated Reconciliation

Automation ensures the real environment matches Git.

Examples:

  • CI/CD pipelines apply Terraform

  • Scheduled drift detection jobs

  • Controllers continuously reconciling state

No more silent drift.


GitOps in Real Infrastructure Scenarios

Scenario 1: Firewall Changes

Old way:

  • SSH into firewall

  • Add rule

  • Forget to document it

GitOps way:

  • Modify firewall rule in code

  • PR reviewed

  • Automated validation checks policy

  • Change applied through pipeline

  • Audit trail preserved


Scenario 2: Linux Server Baseline Hardening

Instead of manually:

  • disabling services

  • editing sysctl

  • adjusting SSH configs

Define:

  • baseline role in Ansible

  • security profile in code

  • versioned config

Drift detection alerts if someone changes settings manually.


Scenario 3: n8n Workflow Deployment

Even automation platforms benefit from GitOps.

Instead of:

  • editing workflows directly in UI

You:

  • export workflows as JSON

  • store in Git

  • review changes

  • deploy via pipeline

Now automation itself is controlled and auditable.


The Security Benefits of GitOps

1) Least Privilege Enforcement

Direct production access can be reduced:

  • Engineers don’t need SSH for routine changes.

  • Pipelines execute approved changes.

2) Audit-Ready by Design

Git history becomes:

  • change log

  • approval record

  • rollback mechanism

3) Faster Incident Recovery

Rollback = revert commit + pipeline run.

No guessing what “used to work.”


A Practical Adoption Roadmap

Phase 1: Version Everything

  • Move infra configs to Git

  • Protect main branch

  • Enforce PR reviews

No automation changes yet—just discipline.


Phase 2: Add Automated Validation

  • Linting

  • Policy-as-code checks

  • Security scanning

  • Plan previews (e.g., Terraform plan in PR)


Phase 3: Restrict Manual Production Changes

  • Limit direct SSH

  • Require pipeline for infra updates

  • Monitor drift


Phase 4: Continuous Reconciliation

  • Scheduled drift detection

  • Automated correction (where safe)

  • Alerting on unauthorized changes


Common Mistakes

“GitOps means no humans touch prod.”

Not realistic. Break-glass access must exist—but logged and controlled.


“We need Kubernetes first.”

False. GitOps is an operational model, not a platform requirement.


“It slows us down.”

Initially, yes.
Long term: fewer outages, faster rollbacks, stronger security.


Conclusion

GitOps is not about tools.
It’s about control, visibility, and repeatability.

For infrastructure teams, it means:

  • fewer midnight surprises

  • better audit posture

  • safer automation

  • and less reliance on fragile tribal knowledge

Manual changes scale chaos.
Declarative control scales stability.

Zero Trust SSH: Hardening Linux Access Without Breaking Operations

Zero Trust SSH: Hardening Linux Access Without Breaking Operations

SSH is still the backbone of Linux operations—incident response, patching, break-glass access, automation, and day-to-day administration. But in many environments, SSH access is treated as a binary switch: either “you can log in” or “you can’t.” That model doesn’t scale in modern organizations where identities change, devices roam, and the blast radius of compromised credentials is massive.

A “Zero Trust” approach to SSH doesn’t mean you stop using SSH. It means you stop trusting networks, long-lived keys, and static access by default—and start validating identity, device posture, intent, and session context every time.

This guide shows a practical hardening path you can roll out incrementally—without crippling your on-call team or breaking automation.


What “Zero Trust” Means for SSH

In practice, Zero Trust SSH is built on four principles:

1) Strong identity over static credentials

Prefer short-lived credentials tied to a real identity and centralized policy.

2) Least privilege by default

Access is constrained to the minimum commands, hosts, time windows, and environments.

3) Continuous verification

Authentication is necessary, but not sufficient—authorization, posture, and session behavior matter too.

4) Auditability and revocability

You should be able to answer: Who accessed what, when, why, from where, using which device—and what did they do? And you should be able to revoke access instantly.


Baseline Hardening in sshd_config (Low-Risk, High-Impact)

Start by making SSH safer without changing workflows.

Disable password auth (or phase it out)

Passwords are phishable and reused.

  • Target state: PasswordAuthentication no

  • Transition: restrict password auth to a bastion or limited group temporarily.

Disallow root SSH login

Require named accounts + privilege escalation.

  • PermitRootLogin no

Reduce attack surface

  • AllowUsers / AllowGroups to explicitly constrain who can log in

  • MaxAuthTries 3

  • LoginGraceTime 30

  • X11Forwarding no (unless truly needed)

  • AllowTcpForwarding no (enable only for specific roles)

  • PermitTunnel no (unless required)

Use modern cryptography

If you maintain older systems, align carefully, but aim for modern KEX/ciphers/MACs and disable legacy algorithms.


Key Management: Stop Treating Keys as Forever Credentials

Traditional SSH keys tend to live for years, get copied between laptops, and are rarely rotated. That’s the opposite of Zero Trust.

Use short-lived SSH certificates (preferred)

Instead of distributing public keys everywhere, you issue SSH certificates that expire (e.g., 8 hours).

  • Central authority signs user keys.

  • Servers trust the CA.

  • Revocation becomes manageable (short TTL + CA policy).

Operational win: You don’t have to chase keys on every server. You control access centrally.

If you must use authorized_keys, lock them down

At minimum:

  • Enforce key rotation (e.g., quarterly)

  • Ban shared keys

  • Ban copying prod keys to personal devices

  • Add from= restrictions when feasible

  • Use separate keys per environment (dev/stage/prod)


Identity-Aware Access: Tie SSH to Your SSO and MFA

SSH should not be the last holdout that bypasses MFA.

Options to achieve MFA + centralized policy

  • Identity-aware proxies / gateways for SSH

  • SSO-integrated access platforms

  • PAM modules and centralized authentication stacks

Goal: When a user leaves the company, access is gone instantly. No lingering keys.


Device Posture: Not All Laptops Are Equal

Zero Trust assumes compromise is possible—so you validate the client, not just the user.

Practical posture checks for SSH access

  • Corporate-managed device requirement for prod

  • Disk encryption enabled

  • EDR running

  • OS patch level within policy

  • MDM compliance state

Even if your SSH stack can’t enforce posture natively, you can enforce it at the access gateway/bastion layer.


Authorization: Don’t Grant Shell When You Only Need a Command

Many operational tasks don’t require full shell access.

Use role-based access patterns

  • Prod read-only role for logs/metrics checks

  • Deployment role limited to CI/CD runners or restricted commands

  • Break-glass role time-bound and heavily audited

Command restriction patterns

  • sudo with tight sudoers rules

  • ForceCommand for narrow workflows

  • Separate service accounts for automation with scoped permissions

Result: even if a credential leaks, the attacker doesn’t get free roam.


Session Controls: Recording, Auditing, and Alerting

Hardening isn’t only about preventing access—it’s also about detecting misuse.

Minimum viable auditability

  • Centralize SSH logs (auth + command where possible)

  • Forward to SIEM

  • Alert on:

    • new source IP / geo anomaly

    • unusual login times

    • first-time access to sensitive hosts

    • repeated failed logins / brute patterns

Session recording (for sensitive environments)

For prod and privileged roles, session recording can be a game-changer—especially in regulated environments.


Automation & CI/CD: Secure SSH Without Breaking Pipelines

Automation is often the reason teams avoid tightening SSH. The key is to treat automation identities properly.

Use distinct machine identities

  • Separate credentials per pipeline / per environment

  • Don’t reuse human keys for automation

Prefer ephemeral credentials for runners

  • Short-lived certs or tokens for CI jobs

  • Rotate secrets automatically

  • Restrict what the runner identity can do (commands/hosts/network)

Add guardrails

  • Only allow automation access from known runner networks

  • Require code review for changes affecting prod access workflows

  • Alert on automation identity used outside pipeline windows


A Rollout Plan That Won’t Cause Pager Fatigue

Phase 1: Baseline hardening (1–2 weeks)

  • Root login off

  • Passwords phased down

  • AllowGroups / allowlists

  • Logging centralized

Phase 2: Centralize identity and MFA (2–6 weeks)

  • SSO integration or gateway

  • Remove shared keys

  • Define roles (read-only / deploy / break-glass)

Phase 3: Ephemeral access + posture (1–3 months)

  • SSH certs with short TTL

  • Device compliance enforcement for prod

  • Session recording for privileged access

Phase 4: Continuous improvement

  • Access reviews

  • Automated key/credential lifecycle

  • Better detections and response playbooks


Common Pitfalls to Avoid

“We’ll just block SSH from the internet”

Good start, but not Zero Trust. Internal networks can be compromised.

“We’ll enforce MFA but keep permanent keys”

MFA helps at login time; permanent keys can still leak and live forever.

“We’ll lock it down later”

SSH is one of the highest-impact attack paths. Hardening is one of the best ROI security projects you can do.


Conclusion

Zero Trust SSH is not one product or one config. It’s a practical shift:

  • from static keys to short-lived credentials,

  • from network trust to identity + device trust,

  • from broad shell access to least privilege,

  • from “hope nothing happens” to auditable, revocable access.

You can start today with baseline sshd hardening and a clear rollout plan—then move to centralized identity, ephemeral access, and posture enforcement without disrupting operations.

A Step-by-Step Guide to Moving Your IIS .NET Applications from On-Premises to Azure Environment

 Transitioning Seamlessly: A Step-by-Step Guide to Moving Your IIS .NET Applications from On-Premises to Azure Environment

Introduction:

In today’s digitally-driven world, businesses are seeking efficient, scalable, and cost-effective solutions for their applications. The move from on-premises hosting to a cloud-based environment, such as Azure, has become a strategic imperative. This article offers a step-by-step guide to successfully transitioning your IIS .NET applications from on-premises to the Azure environment. By integrating Azure DevOps, Jenkins, and GitHub, you can leverage the power of continuous integration and deployment, making the transition smooth and efficient.


Why Move to Azure?

Cloud computing continues to redefine the landscape of modern business. Microsoft Azure, with its robust infrastructure, has emerged as a leader in this space, providing extensive capabilities for deploying, managing, and scaling applications.


 Key Benefits of Azure:


Scalability and Flexibility: Azure allows you to scale up or down based on your application’s demand, leading to cost savings.

Reliability and Security: Microsoft invests heavily in security, making Azure one of the most secure cloud platforms.

Integration with Tools: Azure seamlessly integrates with various DevOps tools like Jenkins, Azure DevOps, and GitHub, simplifying the deployment process.

Planning the Migration: Step-by-Step

The successful transition of your IIS .NET applications to the Azure environment relies on a strategic and systematic approach. The following steps provide a roadmap for this journey.


 Step 1: Pre-Migration Assessment

Before initiating the migration process, conduct an assessment of your current .NET applications. This helps identify potential issues that could arise during the migration.


Subtasks in Pre-Migration Assessment


Review the application’s architecture

Analyze the application’s dependencies

Evaluate the security requirements

Step 2: Set Up Azure Environment

Prepare your Azure environment for migration. This involves setting up Azure DevOps, creating an Azure App Service for hosting your application, and configuring necessary network components.


Step 3: Configure Continuous Integration/Continuous Deployment (CI/CD)

Implementing CI/CD is crucial for maintaining a consistent and reliable deployment process. Set up Jenkins or Azure DevOps pipelines to automate the build and deployment process.


Step 4: Migration

With the environment set up and CI/CD configured, you can now proceed to the migration of your IIS .NET applications. Use Azure’s migration tools or manually move the application code and data.


Step 5: Post-Migration Testing and Optimization

Post-migration, it’s important to thoroughly test your applications and optimize them for the new environment.


Leveraging Jenkins, GitHub, and Azure DevOps

These tools are instrumental in streamlining the migration process and maintaining a high standard of application performance post-migration.


Jenkins

Jenkins is an open-source automation server that can help to automate the non-human part of the software development process. It integrates with Azure, allowing you to manage and control the application development process from a centralized platform.


GitHub

GitHub hosts your application’s code, facilitating collaboration among teams. When integrated with Azure DevOps and Jenkins, you can automate the process of code integration and deployment.


Azure DevOps

Azure DevOps provides a range of services, including Azure Pipelines, which supports CI/CD, enabling automatic deployment of your applications.


FAQs

Q1: How can I ensure the security of my application during the migration process?

Azure provides numerous security tools and best practices to ensure data integrity during the migration.


Q2: What if my application performance degrades after the migration?

Azure provides tools for monitoring application performance and diagnosing issues, allowing you to optimize and improve performance post-migration.


Q3: Can I integrate other CI/CD tools with Azure?

Yes, Azure provides seamless integration with a range of CI/CD tools including Jenkins, GitHub Actions, and others.

 Conclusion

The transition of your IIS .NET applications from an on-premises environment to Azure doesn’t have to be daunting. By following a systematic approach and leveraging the capabilities of Azure DevOps, Jenkins, and GitHub, you can make this process seamless and efficient. Embrace the opportunities that Azure offers to optimize your application and bring it to new heights in the digital space.

Migrating OnPrem GitHub, Jenkins, IIS CI/CD Environment to Azure DevOps and Kubernetes

 Introduction

With the increasing popularity of cloud platforms, many organizations are moving their development and deployment operations to the cloud. Azure DevOps and Kubernetes are two popular cloud platforms that offer several benefits to businesses. If you’re still using OnPrem GitHub, Jenkins, IIS CI/CD environment, it’s time to migrate to Azure DevOps and Kubernetes.


This article will guide you through the process of migrating OnPrem GitHub, Jenkins, IIS CI/CD environment to Azure DevOps and Kubernetes. We will explore the benefits of using Azure DevOps and Kubernetes and the steps involved in the migration process.


 Why Move to Azure DevOps and Kubernetes?


Migrating to Azure DevOps and Kubernetes offers several benefits, including:


  1. Scalability: Azure DevOps and Kubernetes offer scalability, making it easy to increase or decrease resources as needed.


  1. Cost Savings: Azure DevOps and Kubernetes are cost-effective compared to OnPrem GitHub, Jenkins, IIS CI/CD environment.


  1. Automation: Azure DevOps and Kubernetes offer automation capabilities, reducing manual work and increasing efficiency.


  1. High Availability: Azure DevOps and Kubernetes offer high availability, ensuring that your applications are always available.


Steps Involved in Migrating OnPrem GitHub, Jenkins, IIS CI/CD Environment to Azure DevOps and Kubernetes


  1. Evaluate Your Current Environment: Before migrating to Azure DevOps and Kubernetes, evaluate your current environment. Identify the applications, services, and dependencies that need to be migrated.


  1. Create an Azure Account: To use Azure DevOps and Kubernetes, you need an Azure account. If you don’t have an account, create one.


  1. Set up Azure DevOps: Once you have an Azure account, set up Azure DevOps. This involves creating a new organization and project.


  1. Create a Kubernetes Cluster: To use Kubernetes, you need to create a Kubernetes cluster. You can create a cluster in Azure Kubernetes Service (AKS).


  1. Install Jenkins in Kubernetes Cluster: Install Jenkins in the Kubernetes cluster. This involves creating a Jenkins deployment and service.


  1. Migrate GitHub Repositories: Migrate the GitHub repositories to Azure DevOps. This involves creating a new Git repository in Azure DevOps and pushing the code.


  1. Migrate Jenkins Jobs: Migrate the Jenkins jobs to Azure DevOps. This involves creating new pipelines in Azure DevOps and configuring them.


  1. Migrate IIS Applications: Migrate the IIS applications to Kubernetes. This involves creating a Docker image of the application and deploying it to Kubernetes.


  1. Test and Validate: Once you have migrated all the applications and services, test and validate the new environment. Ensure that everything is working as expected.


 FAQs


Q: What is Azure DevOps?

A: Azure DevOps is a cloud-based platform that offers several services, including source control, build and release management, and project management.


Q: What is Kubernetes?

A: Kubernetes is a container orchestration platform that automates deployment, scaling, and management of containerized applications.


Q: Why Should I Migrate to Azure DevOps and Kubernetes?

A: Migrating to Azure DevOps and Kubernetes offers several benefits, including scalability, cost savings, automation, and high availability.

Conclusion

Migrating OnPrem GitHub, Jenkins, IIS CI/CD environment to Azure DevOps and Kubernetes is a necessary step for organizations that want to take advantage of the benefits offered by cloud platforms. The migration process involves evaluating your current environment, creating an Azure account, setting up Azure DevOps, creating a Kubernetes cluster, installing Jenkins in the Kubernetes cluster, migrating GitHub repositories and Jenkins jobs, migrating IIS applications, and testing and validating the new environment.

By migrating to Azure DevOps and Kubernetes, you can enjoy scalability, cost savings, automation, and high availability. Make the move and take your business to the next level.

Node.js Application with a DevOps Workflow using Github, Jenkins, SonarQube and Azure Kubernetes

Setting up a DevOps Environment using Node.js, Github, Jenkins, SonarQube, and Azure Kubernetes

Developing a Node.js application is a common use case in the software development industry. In this article, we will show you how to set up a DevOps environment for a Node.js application using Github, Jenkins, SonarQube, and Azure Kubernetes.

Github is a version control system that allows you to store and manage your code in a centralized repository. To start, you need to create a Github repository for your Node.js application.

Next, we will set up Jenkins for continuous integration. Jenkins is a tool that automates the process of building, testing, and deploying code. To configure Jenkins, you will need to install the Jenkins plugin for Github. This plugin allows Jenkins to automatically build and test your code when changes are pushed to the Github repository.

After that, we will set up SonarQube, which is a code quality tool. It analyzes the source code of your application and identifies potential issues such as bugs, security vulnerabilities, and code smells. To set up SonarQube, you need to install the SonarQube Jenkins plugin. This plugin integrates SonarQube with Jenkins and allows you to run code analysis before deploying the code.

Finally, we will deploy the application to Azure Kubernetes, which is a managed Kubernetes service provided by Microsoft. To deploy the application, you will need to create a Kubernetes cluster in Azure and configure it to run your application.

In summary, by setting up a DevOps environment using Node.js, Github, Jenkins, SonarQube, and Azure Kubernetes, you can automate the process of building, testing, and deploying code, ensuring that your application is of high quality and is deployed to production in a timely manner.

Node.Js to Kubernetes journy

Node.Js to Kubernetes journy

Hello all,

Yea yea long time no see 🙂 I know, I haven’t share a new improvement story for long time . Improvement is a kind of life style for me but I couldn’t have time share all of it.

In the mean time I had a lots of changes in my life but the most important is , I have owned my own company , Bigs Bilisim Ltd.Sti. “https://www.bigsbilisim.com

This days , I have some spare time to write a blog , here is the my latest post

Node.Js Application on Docker.

I am managing a multinational companies infrastructure as a Linux / Windows admin and Devops Engineer . My customers ERP systems has no access to internet in any way. ERP systems internet access is not allowing even by a proxy because of the company policy.

Every morning one of trainee updating the all exchange rates in the ERP system manually. Time to time wrong entries or similar mistakes can cause couple of problems.

One day one IT Application teams member called me and can we write a small app for this manual operation. Because ERP system has got the ability of import xml files to ERP system . T.C. Mekez Bankası also publishing the rates as xml format. My answer was challenge accepted 🙂

Well I am not a programmer but I though, I can handle it some how.

I have googled couple of similar solutions and scenarios about the requested solution. I have found the node.js world.

I have wrote the code in one day , If you consider , I don’t have programmer background , it is good timing , I guess.

Here is the code of

index.js and package.json

Now when I have run the program in node js it is getting the exchange rates as in xml format by calling url;

Like ;

curl xxx.xxx.xxx.xxx:3000/exchangerates

When they have try to call this url via ERP systems it was successfully entering the Exhange Ratest in it.

Now the challenge is how this small program run in smooth environment without any effects.

This wasn’t a hard task to do it but this time I would like to made a fantasy;

Lets dockerize it.

I have share this program and my dockerize fantasy with the customer, They love it and they were really looking forward the taste it of container technology .

First I have install docker desktop to my machine ,

It was another challenge for me , but after watching couple of video , I have prepared the Docker file for this program.

Now I need to create the docker container on my desktop.

I have used this command:

docker build . -t ckocaman/exchange_rates:”Latest”

After creating the container I have push it to my docker hub account.

After pushed to hub , I can install on any containerized technology system.

At the beginning it was working on a single docker server , in these days it is a part of a kubernetes cluster as a pod and service.

This small application development story has been opened the application virtualization technology window to me. Well I am still learning it ( I hope every IT Guys keep learning every day !) , but I assume I can do better things with that .